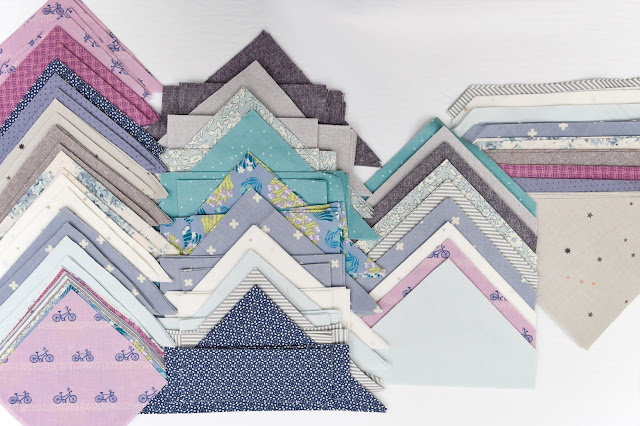
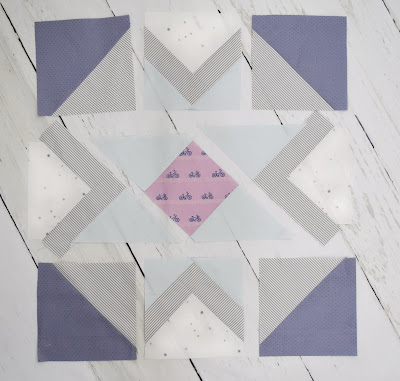
We're taking our pretty piles of fabric and sewing blocks this week!
Congrats to Jessica @cuzchica! You've won the Aurifil bundle of 3 threads of your choice plus a pattern from my shop! Send me an email with your three thread preferences!
This week's giveaway is a 6 month membership to Make Modern Magazine! I love Make Modern. Imagine the creative inspiration that would come in issues with this epic magazine!
I was once a Covergirl on a Magazine!
It was actually Make Modern, and it was actually my Potter's Wheel quilt, but that's all beside the point.
An announcement:
We have two amazing Longarm quilters that are welcoming your quilts for longarm service, and offering special discounts to you.
Sheri of Violet Quilts is located in Fall River NS, and is my local longarmer. She has quilted over half my quilts!
Dara Tomasson is in Nanaimo BC, and is well known for her custom longarm quilting. She's my go-to for custom quilting.
Both of these lovely quilters are offering 25% off of batting and 10% off of longarm quilting services on all Yonder quilts. It would be a great idea to be in touch and book with them in advance if you're interested!
This week's task:
This is the week we get to start sewing blocks. Our goal is to sew a third of our blocks:
Throw: 5
Twin: 8
King: 12
If you're not finished last week's goal, no probbie! I bet you could be all caught up in no time. Week 1 is the only heavy work week, so you can adjust your goals for Week 2 by getting Week 1's work accomplished and letting some of this week's task overflow into next week..
I find the Yonder blocks such a satisfying block to sew, and since efficiency is my favourite thing, I've got a sewing-yonder-blocks method I'd like to share.
My tips for efficient sewing:
Please note: I am still following the instructions as they are in the pattern, so keep the pattern's instructions nearby as you sew your blocks. I'm showing how I sandwich the steps to do multiple steps in one bite.
In sharing this I'd also like to say, if these methods aren't your style you do what works for you! These methods work for me, and could be helpful for others, but you find a groove that's a good fit for you.
1. Assembly line piecing / Chain piecing: I love these methods so I don't have to trim threads while I'm assembling. I zoom multiple pieces through the machine at one time, and I find it saves me time and effort.
2. I start one block at a time, so I don't get parts of blocks mixed up. As you'll see in the videos below, I assemble a block in 3 sittings at the machine.
Though I don't show it in the video, I often start piecing an additional block during the second or third video, (and these wouldn't get mixed up with the original block because they're in different stages of completion.)
3. I'm not pinning (but you can). If you follow pressing directions suggested in the pattern, all intersecting seams in the block will nest, so I nest the seams and hold the pieces together until they go under the presser foot.
4. When assembling both types of "house units", I finger press seams so I can add additional pieces without having to get up and press the pieces open at my iron.
This first video shows how far I can take the blocks at one sitting at the machine. I sew D to C3, both types of "house units", and B pcs to A.
Then I take these to the iron, and trim the parts indicated in the pattern.
A note for trimming D,C3: Since this is a bias seam, sometimes sewing these two pieces together will cinch the fabric a bit, and D will appear a little smaller than its cut measurements. Once I've set the seam, and pressed, I give both ends of the seam a gentle tug, and this brings D to its full size again, and the D,C3 pc will now be ready to be trimmed.
Here's what the block looks like before I head back to the machine.
Video 2:
Here, I'm sewing the parts of the block into three sections.
Then I take these to the iron, and trim the centre strip as indicated in the pattern. Here's what the block looks like before I head back to the machine for the final go.
Video 3:
Now all that's left is to sew these three sections together. I match seams (indicated in the pattern) as I go.
Then one last trip to the iron to set the seams and give the block its final press. E has been left a little long up to this point in case it's needed to match up to D. Trim the outer edges of the block to 18 1/2".

Done! These blocks come together so fast once you've made a couple.
Here's what's coming up:
Next week were sewing another third of the blocks, then we have Easy Week where you can catch-up, get-ahead, or take-it-easy. There will be a prize every week, so share your progress every week!
WEEK 3, May 13th
Sew a third of the blocks
Bassinet: 1
Throw: 5
Twin: 8
King: 12
WEEK 4, May 20th
Catch-up, get-ahead or take-it-easy week
WEEK 5, May 27th
Sew remaining blocks
Bassinet: 2
Throw: 6
Twin: 9
King: 12
WEEK 6, June 3rd
Layout and assemble quilt top. Post by midnight June 9th to be entered in the final giveaway, announced on June 10th.


No comments