Showing posts with label Featured. Show all posts

Yonder Quilt


When C+S asked me if I'd be interested in designing patterns for their new collections I had to keep my composure, so I didn't scream "YES!" and make them think I was a weirdo.  Because I'm not.

I was so happy to have the opportunity because:
1.  I'm a huge Rifle Paper fan, and would get a sneak peek at their newest collection.  (I know, we're Textile Designers too, but I feel that has even expanded my appreciation of other designer's creations, and it's fun to spend some time admiring other artist's work!)

2.  I was intrigued by the challenge of acting as a proxy Quilt Designer for another Textile Designer.  I imagine most textile designers have a feel for how they wanted their fabric line to be seen.  Being that for another means I hope to design a quilt that they would love, and that shows off their collection as they wish to portray it. I've enjoyed it!

3.  Though I wasn't attending Fall Quilt Market, I was excited that some of my projects would be there.


I was sent digital artwork of the collection in August and submitted designs within a week.  I submitted a few ideas for the Wildwood collection, and here is one I loved, but I'm glad Yonder was the winner.

In 2018, Anna Bond had her artwork placed on a stamp.  She had mentioned at the time that it was a huge achievement for her because she had loved stamps as a child, (but don't ask me how I know that because I can't find the source, but here's the stamp, so I didn't completely make it up).  So I thought this would make a fun quilt, and C+S basics had a great manilla envelope colour for the background.  I guess this designs will just have to go into the vault for another time.


My goals in designing Yonder were as follows:
1.  No background fabric.  I imagined a high saturation of print and colour.
2.  I wanted to see five different fabrics in a large 18" block.
3.  I was hoping for a pretty secondary design.
4.  I wanted to build from a simple star design I'd fallen for a few months previous.  Andrea of @3rdstoryworkshop had asked me to contribute star blocks to a quilt she was making.  I could make any design I wanted that was a star, and made this simple block.  When I handed the blocks over to her at one of our MMQG meetings, I mentioned, "I think I'm going to play with this star!"  


My quilty to-do list turned into a traffic jam in the Fall due to a truckload of unforseens, so I called out to my amazing quilty friends and they came to the rescue.  Eleanor Thili sewed up this quilt beautifully.

She also fussy-cut the bunny for the centre square (shown in the pic below).  I love her for that!


I knew for a long time I wanted to have it quilted in a woodgrain, but I couldn't find a pantograph that was organic and un-repetitive for my vision, so I rented Bella, the longarm at Violet Quilts, chose a pistachio coloured thread, and quilted it myself over about 5 hours.  


This pattern has been such an agreeable project.  Writing, proofing, testing, sewing, and editing were all easy breezy; so for the present, Yonder is my favourite child.


I always have a giveaway for a new pattern release, so on Friday please see my Giveaway post on Facebook or Instagram to enter.  Contest closes Monday, March 11th at 9am EST.  A winner will be chosen from FB and Instagram, and will win a great big coupon and a digital copy of the pattern for themselves and their tagged friend.

This quilt needs a Quilt Along.  It just does.  So, I'm starting a QAL on April 29th.

Sign up here!

(Since The QAL is finished, here are links to all the content.)

WEEK 1


WEEK 3

WEEK 4

WEEK 5

WEEK 6

Bonus Files:
Using Fat Quarters with Yonder

Using Directional Prints with Yonder

Here's the plan for the QAL:
hashtag to use: #yonderquilt

You can expect an email every Monday of the QAL.  It will link you to the week's Blog post.

In anticipating the "Can I use Fat Quarters?" question, the answer is yes.  You'll need two for every block, but it's tight, and I'd recommend having a few extra FQs on hand in case you need to bring them into the fold.  I'm sewing up a Yonder made with FQs, and there will be a Blog post all about it before the QAL.

I find it best to cut the entire quilt, match up which prints you want together in a block, then make blocks one by one, so that's how I've organized the QAL.

Opening giveaway will be on April 29th. If you have signed up for the QAL you are automatically entered.  Once I draw a name, I'll request to see proof of purchase of the pattern, then the giveaway will be mailed to you!


WEEK 1, April 29th
Steps 1 and 2: Cut all fabric for your blocks, match up fabrics you would like in the same block.

WEEK 2, May 6th
Sew a third of the blocks
Bassinet:1
Throw: 5
Twin: 8
King: 12

WEEK 3, May 13th
Sew a third of the blocks
Bassinet:1
Throw: 5
Twin: 8
King: 12

WEEK 4, May 20th
Catch-up, get-ahead or take-it-easy week

WEEK 5, May 27th
Sew remaining blocks
Bassinet: 2
Throw: 6
Twin: 9
King: 12

WEEK 6, June 3rd
Layout and assemble quilt top.  Post by midnight June 9th to be entered in the final giveaway.

June 10th
Final giveaway winner announced!

It's going to be a fun QAL, I just know it!  I hop you'll join us.  Follow this link to Subscribe!


Shawl Quilt Along starting March 25th

I hosted my first QAL in the Fall, using my Potter's Wheel pattern, and I loved the sense of community that comes form working on the same project together, and watching all these creative and different quilts grow.  During the QAL, I highly recommended commenting on other participants' posts on instagram which resulted in some new quilty friendships for many of us, and that's the best part!

So I'm especially to start another Quilt Along, this time with my Shawl quilt pattern.  Our Shawl Quilt Along is less than 3 weeks away, and I'm already seeing participants colour planning their quilts.


(Since the QAL is now over, here's a quick link to all QAL content, if you would like to follow along.)
WEEK 1

WEEK 2

WEEK 3

WEEK 4

WEEK 5

WEEK 6

WEEK 7

Bonus Files:
Color Hexa, and how it can help you find the colours you're looking for

Fabric Selection

Blog post on the Coral Shawl Quilt

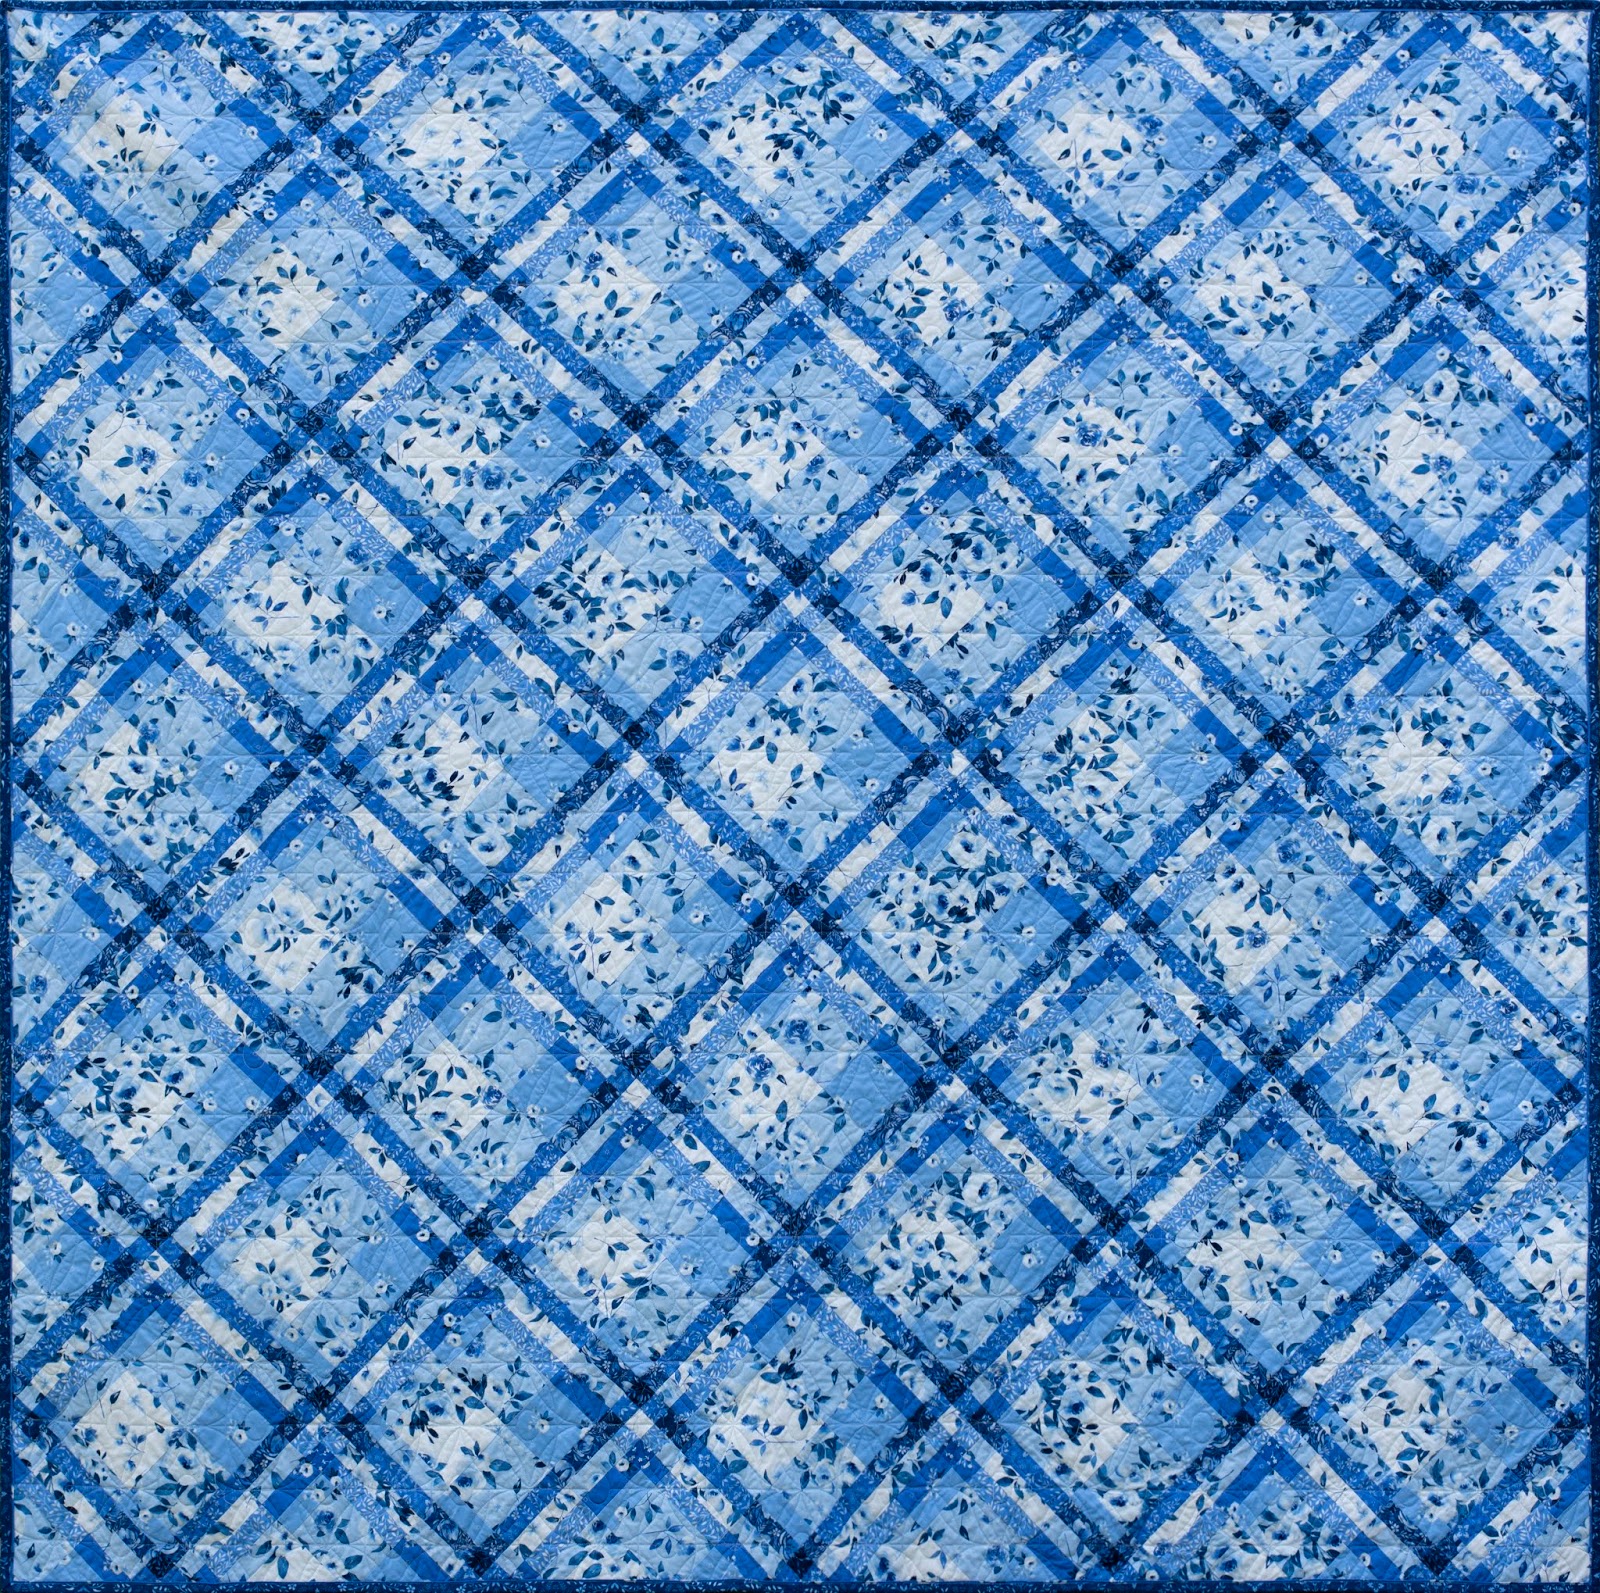
I first designed Shawl over a year ago, wanting to explore transparency in a quilt.  I tried a few plaid designs before I fell for this one, and then used all my brain power to figure out how to plan colours for the quilt, so that the design would appear as a woven shawl.


There's a process fully described in the pattern to pick colours for the quilt.  Colour planning is divided into two steps:

Step 1:  Choosing your main colours (these represent the thread colours that would be used were it actually a woven shawl).

Step 2: Then in the pattern is a chart that helps you determine a colour of fabric that represents when any two of the main thread colours would "so to speak" weave through each other and interact, such as in a woven project when two different threads weave through each other, and from a distance appear as one colour.


Please see my What Shade Are You post for more on this coral Shawl.

I've also added a blog post on using a colour blender to help you select colours as a support for the second part of the fabric choice process.  This process can even work with prints and solids.  Both June's Cottage and Bequest fabrics have been made into Shawl quilts.

My plan is to sew in solids during the QAL.  I'm making a quilt for my youngest, he's 7 and had fun choosing colours with me.  This is the year of new quilts for my kids.  There are loads of my quilts around, but they belong in our common areas.  I think my little guy is excited to have one that's all his own!

Here's the plan for the QAL:
hashtag to use: #shawlquilt

You can expect an email every Monday of the QAL.  It will link you to the week's Blog post.

I find it best to cut and make Blocks, Sashing and Cornerstones separately, so that's how I've organized the QAL.  There are lots of blocks per week, but thanks to strip piecing, and production-line sewing, these parts go together so fast.

Opening giveaway will be on March 25th.  If you have signed up for the QAL you are automatically entered.  Once I draw a name, I'll request to see proof of purchase of the pattern, then the giveaway will be mailed to you!

I'll be making a post before the QAL all about colour planning, talking about how I choose colour, and any tips that could be helpful.  It's our goal to be ready to cut fabric the first week of the QAL so please use the resources such as the first few pages of the pattern, the Color Hexa post and future blog post to choose your fabrics, email me any questions through the blog contact link above, and I'll be sure to answer them in the blog post I'm preparing on colour selection.

Also keep in mind!  If you'd like someone to do all the fabric choosing for you, Missouri Star has kitted out Shawl quilt in the Throw size.

WEEK 1, March 25th
Cut, strip piece and assemble half of your blocks
Crib 9
Throw 25
Queen 36

WEEK 2, April 1st
Assemble second half of blocks
Crib 9
Throw 25
Queen 36

WEEK 3, Apr 8th
Cut, strip piece and assemble cornerstones
Crib 18
Throw 50
Queen 72

WEEK 4, Apr 15th
Cut, strip piece and assemble sashing
Crib 36
Throw 100
Queen 144

WEEK 5, Apr 22nd
Catch-up, get-ahead or take-it-easy week

WEEK 6, Apr 29th
Step 3 and 4 in the pattern; cutting pieces for outer edges and assembling units.

WEEK 7, May 6th
Assemble quilt top and post by midnight May 12th to be entered in the final giveaway.

May 13th
Final giveaway winner announced!

Sheri of Violet Quilts is once again offerring discounted batting and quilting services, so stay tuned for more on that, and info on our sponsored giveaways!


Petticoat Quilt

When I was baptized at 8, my Mom made me a dress for the reception afterwards.  It was peach moire with puffed sleeves, trimmed with lace.  The back of the skirt curved open like two flower petals and underneath was layer after layer of delicate white lace.  With patent leather shoes, and dried baby's breath placed in my braids to top off the look, (yes, you can laugh!) I felt really special in that dress!   Lace underskirts seemed to be something my Mom made for me often.  Baby clothes with ruffle bums, and a gingham dress with lace on the pinafore and underskirt come to mind!
Studying design and the history of clothing in University, I had the opportunity to swoon and sigh over numberless underskirts and petticoats from simple to exceptional and extravagant.  Gah!  I loved those days!
A digital rendering of the Crib size included in the pattern
Since I've had girls of my own, lace has always been a special part of my daughters' special dresses.  I've made sure of that!  I have a little collection of vintage laces, and often look for ways to use them when making things for my girls.

This design is inspired by embellished skirts with layer upon layer of scalloped lace.  I had been dreaming of this design for awhile before I was able to find a curved template that would assist in making it.  A couple of weeks after the Classic Curves Ruler's debut at Spring Market 2017, I discovered it and knew it would work for this design.  It is such a great ruler, and Sharon has made some incredible quilt patterns using the CCR.  I had the privilege of meeting her at  Fall Market and I totally admire her style and the masterful way she designs patterns with her ruler!
Once you've sufficiently admired the incredible free motion quilting by Dara Tomasson, ;) can you find the block?  It's just a simple square block with a curve on one corner.  Blocks are arranged on point to give you this scalloped effect.  I was so excited to make this design with our June's Cottage prints!
This quilt comes together so fast!  Inner and outer curves are cut from the same square of fabric and that takes a couple steps; but then after sewing one curved seam, trim the block with the help of the 'true-up template' provided, and the block is complete!
Since it releases today, we're doing a giveaway as per usual, (!) but Sharon at Color Girl Quilting is making it even better, by adding the Classic Curves Ruler to the giveaway!!!

Come to Instagram or Facebook, follow us, and tag a friend.  One friend per entry and a total of five entries allowed at both locations.  Giveaway will close on Friday at 10pm EST, and I'll announce a winner on Saturday.  The winner and her tagged friend will win a free pattern, AND will both be sent a Classic Curves Ruler!  Good luck!!!
Also, the Petticoat pattern will be 25% off until Monday am.  Use the code NEWPATTERN.
Here are some ways I'd love to play out this pattern in the future, but you're welcome to beat me to it!  As per usual, there's a colouring page included in the pattern, so you can plan out your colour placement before you get started.  Whether you see a nautical themed ocean wave quilt, or a stormy sky, an ombre layout, scallops of different colours or something completely different, tag us!  I'd love to see what you create with this pattern!


Arbitrary Artwork

Here another piece that I did today. What I’m loving about this new-ish style is that it’s so much more arbitrary. The word arbitrary is just the perfect word for this. It means: based on random choice or personal whim, rather than any reason or system.

And that’s exactly how I tackle this style. Rather than approaching a painting with a set plan (bouquet of pink roses, pattern of evenly dispersed blooms, etc), this style forces me to just go with the flow and do whatever feels natural. Sometimes that means splatters. Sometimes that means random, meaningless strokes for the sake of the composition. It’s fun and playful and very freeing.


The Struggles of an Artist: the Elusive Lucky Break

Everyone knows the expression "the starving artist". The awful truth is that that is, more often not, accurate. Having gone to college alongside the a whole range of artists I can tell you that even the geniuses out there and the most talented of creators still struggle to make ends meet without a lucky break. It's so tragic. It's not like any other industry. Hard work and talent will not guarantee success and that hurts my heart. If you're a doctor and you work hard and you're talented, you'll succeed. There will always be a need and a way to rise up. If you're a McDonald's worker, and you work hard and you're talented at what you do, you can climb your way up the ladder. That's not always the case with artists. I saw an article last week on Facebook, which was telling adults to inform their youngsters that they don't all have to go to college, pursue academics and become wildly wealthy and successful professionals. It wanted us to encourage them to work with their hands, and to master their blue-collared craft. At first, I admit, I thought the same thing. Being an artist myself, who daily works with her hands, I would love to tell my own kids that they should go for it and they can become very successful and prosperous craftsmen. I've been thinking a lot about it lately actually. My business partner, Julia, and I constantly talk about what more we can do. How can we improve? What new things should we try? How can we get more followers? Which social media avenues should we focus on now? What's popular now? How many hours a day can we devote to this and still have sane families and homes?

And the more I follow others who, at least on the surface, appear to be successful, boasting tens of thousands (or MORE) of followers on Instagram and sales and lots of different ways they're making money with their talent/products, the more I think: they've had their LUCKY BREAK. That's it. They haven't necessarily cracked the social media code. (Although geniuses like Emily Dennis really have!) They don't necessarily have a better looking feed, or more stories, or more Pinterest posts. Their photography skills haven't boosted their following an extra 50%. While I agree that all of those things are important and can in fact 'up' your following a lot,  I truly believe that there are thousands of us creatives that work and work and work to do our best and follow all of the 'rules' and we're still just plugging away gaining about 4 followers a day. That is UNTIL some big shot comes along and says, "yup, it's their turn", and gives you a LUCKY BREAK. Until then, we'll keep plugging away, trying new things, and showing our best. For example, today I tried something slightly new; a little more energetic, and little more freestyle and I absolutely love it! Check it out:


Nathan, my dear husband (and Julia's younger brother), says it reminds him of 1980s make up. HAHAHAHAHAHA!!

Botanica Quilt

To those who are visiting our blog for the first time, welcome!!! I'm Julia! I'm a mom to 2 girls and 2 boys, married, and love living close to the Atlantic Ocean. My sister-in-law and I are the makers of Briar Hill Designs. We're having a blast working together! We share all about our quilting and art on Instagram at @briarhilldesigns, on Facebook and here on our Blog. 


So, here she is! My quilt for the What Shade Are You Blog Hop! I'm quite in love with Cotton Supreme Solids, and since I couldn't say "I'll take 'em all!" I delightedly settled on this palette of beauties!

Here's the list of Cotton Supreme Solids I used:
- Glow in the Dark
- Bowood Green
- Martini Olive
- Pea in a Pod
- Peridot
- Hydrangea
- Opera Mauve
- Marvelous
- Cloud 9
- Periwinkle
- Lancaster Sky
- Hyacinth
- Amethyst
- Feelin' Blue
- Jacaranda
- Purple Haze
- Verbena
- Jean Jacket
- Celeste
- Tourmaline
- Banana Cream
- Harlequin
- Citrus
- Citron
- Custard
- Linen White
- Lemon Chiffon
For the background I chose Swan. It's the perfect not-quite-white, and I'm ordering a bolt of it next week, I like it that much.


Sewing has always been a great interest of mine, though my love for quilting came quite a bit later. I sewed decor for my dollhouse as a kid, then clothing for myself and friends as a teen. I studied all-things-sewing at University including pattern making, tailoring, and reproducing period clothing. I then moved on to making wedding gowns, theatre costuming, and alterations until we had children. Sewing then changed to sundresses and stuffed animals. I even opted to make my kids duvet covers instead of quilts! I'm embarrassed and a little mad at myself that it took me so long to give quilting a go! My first taste of quilt making, and I was hooked! I followed a pattern for my first two quilts, and every one since then has been my design.


Design inspiration can come from many different venues. For this one, I set up some criteria, and came up with the design for this block from there:

·I wanted to design a quilt that could show off the soft and gentle side of working with solids.
·It needed to be a block that could be successful for many levels of quilter, while also teaching skills.
·I designed this pattern in the dreariest, slushiest, bone chilling cold of grey Nova Scotian winters (now you really want to visit, right?!) so I also made a requirement that this design needed to help me think happy thoughts of warmer weather. So this was nicknamed "The Happy Quilt" until I chose to name her Botanica.

I designed the blocks in EQ7, then made tweaks to the curves to fit the Circle Cut Ruler by EZ Quilting. Curved piecing, and what I call true-up templates help the blocks come together with ease.


Making Botanica with these warm purples, soft yellows and spring blues was made especially enjoyable because I could also choose mini palettes for individual blooms. Seriously, the 49 blocks in this quilt were not enough to play out all the dreamy colour grouping potential!
Blocks are 12" and set in a half-drop layout. They're also rotated so the leaves point every which way, which adds to the organic look of the quilt.


Backing is Cotton + Steel's Checkers in Sky. Their gingham is a favourite of mine! This is the third time I've used one of the gingham weaves as a backing. I've used ½", 1" and their 2½" checkers and they all look great.  As a bonus, it's a little wider than most quilting cottons at 50" so I could piece the back of this 84" quilt in two pieces instead of three.
I thought long and hard about how to have it quilted. In the end I chose a favourite loopy edge-to-edge, that Violet Quilts and I built together.
Batting is Hobbs Heirloom Premium Wool, and the scrappy binding was made with a selection of pastel tinted solids in the bundle.
I'm so pleased with how it turned out in these gorgeous colours! For a chance to win your own botanical bundle of fabrics, follow @briarhilldesigns, and @rjrfabrics, and tag a friend on the giveaway post! While you're here, and if you are on your home computer, you can subscribe from the home page of the blog. We'd love to share our creative adventures with you as well as send some freebies your way every once in awhile!  See you around!  


New Spring Quilt Pattern


 So far, I'm able to call myself a quilt finisher. I usually work on about four quilts at a time in different parts of the process, but they do all get done. And I don't start many more projects before one has been completed. I like it this way! It keeps my to-do list short, or at least, not too overwhelmingly long!  ;)

This winter, facing snowstorm after snowstorm, I was desperate for the thought of spring. A quilt idea suddenly took shape in my mind, I designed it and within a very short couple hours, I was testing out the block. I had a few other deadlines looming, but I thought a little spring would do me good, and it has!


I designed this quilt to use 2 1/2 inch squares in the tulip patchwork
The pattern includes amounts needed if you would like to use 2 1/2 inch pieces from your stash, and also how many you'll need of other precuts.  So, whether this will be a scrapbuster, or cut from precuts Or yardage, I've got ya covered!

For this quilt, I used Lecien's antique flowers in pastel, and added a few pieces from Brenda riddles line, Guernsey.

I fell in love with these sweet florals, and his new they would look so Spring-y with this pattern. I deliberated over what colour background to use, but I'm happy I chose the cream background. I find it softens the entire quilt, and I'm quite certain I'll be using this delicate creamy white much more often.


These blocks go together so easily.  This is a great beginner quilt for someone who's ready to take on curves. The curves are very soft, so it's very easy to manage, and I have instructions in the pattern for everything you need to know about curved piecing: cutting curves, how to start sewing, easing the two curves together, pressing, and truing up.

All curved piecing comes with truing up templates, which ensure excellent blocks.

Every one of my pattern testers commented that the curved piecing went so much more successfully than they had expected! I love this! Isn't that what we all want to for our sewing projects? To have successful outcomes!  I'm so delighted that my pattern help them learn a new skill successfully!

The backing was pieced in a brick lay style with leftover pieces from the fat quarters, and a few extra prints that weren't on the front.


It's actually easy to figure out how many pieces you'll need!  I will prep a tutorial on how to do it!

I love how the front of the quilts is understated simplicity, and the back of the quilt is this huge saturation of colour!

I searched for way too long for pantograph that I thought would look sweet on the quilt.  In the end, I asked my quilter if we could design an edge to edge. She happily obliged and we came up with this sweet little thing! I love how it turned out, and I'll definitely use it again! Quilting was done by Sheri from Violet quilts.


My scrappy binding helped to use up lots of the last bits of fabric.  I barely have any fabric left, just the way I like it!

Country Clothesline has put together quilt kits for both the Crib and Throw sizes of the quilt using mostly the same bundle of fabrics I used for mine!  And, as always...


... the New Spring Quilt Pattern is available in our Etsy shop!


Best Dressed Mini Quilt


This is a quilt I want to make over and over and over again! It's made using 2 1/2 inch squares. I used mini charms, five packs of them, but you could easily do this with any pre-cuts, or do some serious scrap busting.

The pattern comes with paper templates, which I love!  I cut them out, then tape them to the backside of a ruler. I align the paper on the fabric and cut the edge. I can cut about four+ fabric pieces at a time!

The fabric collection I chose is called Hazelwood by One Canoe Two.  There's a huge variety of prints and colors, and I love how some bows make me think of hair bows, while others remind me of bowties. It makes me think of a little group of Sunday School kids in their finest.


The quilt comes together fast, using a great technique called 2D chain piecing! 

Free motion quilting is something I'd like to practice more at.  I'm alright at walking foot quilting, I'm very good at dropping my quilts off at Violet Quilts for her longarm service ;) , but my free motion quilting skills could use some work!  This was free motion quilted with coral cotton thread. Every circle was stitched individually, no traveling.

To mark the circles, I used the clover blue disappearing marker, and traced around the base of a small thimble, then stitched all the circles.  Using a spring loaded free-motion foot.


The blue marker comes out with water. I found the steam on my iron wasn't enough to do it, so I spritzed it with a spray bottle and the marks disappeared immediately.

This was my first time using this disappearing marker. I will not admit to how many other marketing tools I have tried and not jived with!  I like this one! Since I don't want to prewash my fabrics, I may want to make sure that it's a pretty light spritz of water, so that I don't make the colours bleed before their first wash,(which didn't happen, but I would like to be cautious of that when using this method again) but it really did work successfully!


I backed it with some dear Stella fabric, and used a happy bundle of leftovers from other projects for a scrappy binding, my usual! I cut my binding at 2 1/2". If I'm going to finish my binding with handstitching, I cut it at 2 1/4", but with machine bindings I find 2 1/2" makes the most successful finish.


This mini quilt measures out at 23" x 28".  Adding a 6" border around it would make a perfect baby quilt, measuring 35" x 40"

Pattern is available as a free download Thursday June 15th through Friday June 16th 2017 for subscribing to our blog!  It will also be available after that in our Etsy shop!