Showing posts with label Shawl Quilt. Show all posts

Shawl Quilt Along, WEEK 7, May 6th

Final week!

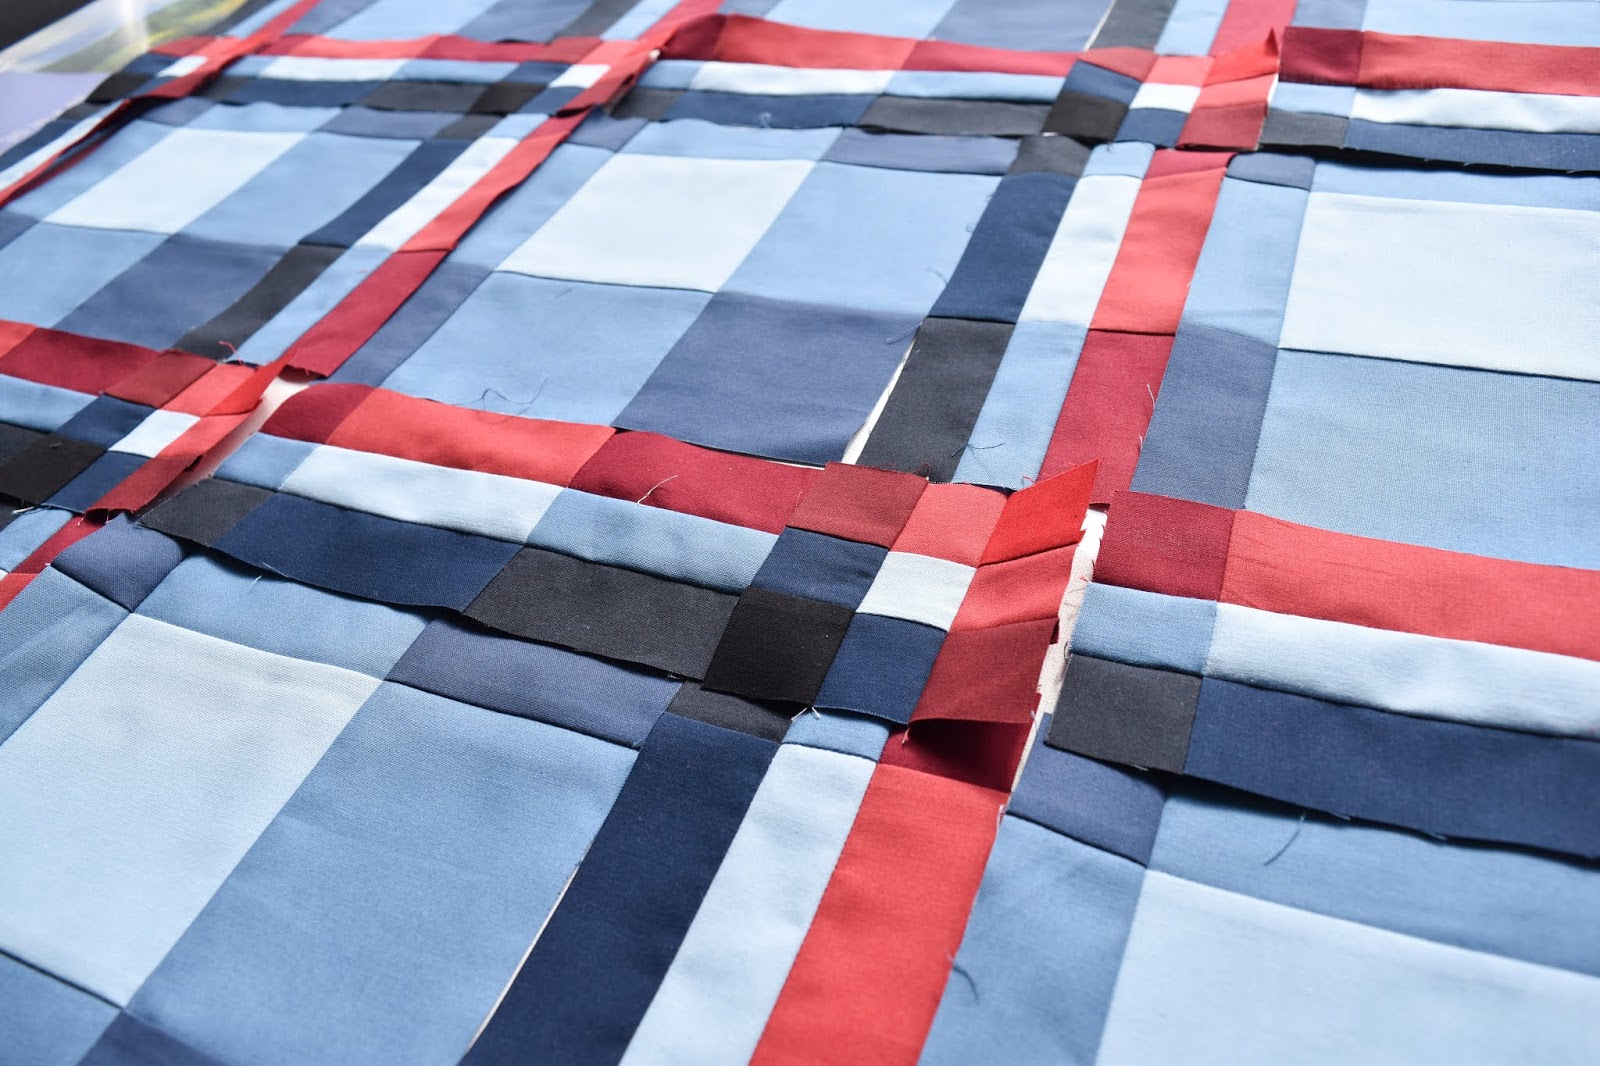
It's finish 'er up week.  We're so close to the finish!  We're starting to see the plaid as these parts come together!

Congrats to Anna from @joyfullychosen.  You've won the surprise bundle from Aurifil!  I'll need your mailing address to get this out to you!


Final giveaway is a bundle from Cotton and Steel's newest release, Neko and Tori!  I got to play with this line back in August, so it's a thrill to see it's arriving in stores.  I envisioned Neko and Tori in a few of my patterns, here's a peek at some of the projects I proposed.


New Spring in Throw


 Potter's Wheel in Twin

All my patterns will be on sale from the 8th to the 16th, use the code BIRTHDAYWEEK to get 20% your pattern order from our shop.  Caverly's birthday is on the 8th and mine is on the 15th, so we always like to celebrate what we call our Briar Hill Birthday Week.  :)


Here are some tips for the week:

As mentioned last week, the instructions for assembling this quilt up look more complicated than they really are...

Some people are drawn to written instructions, some just want to understand the concepts and take it from there, and some people are drawn to an image.  Quilt Assembly includes instructions for all these different learning styles, so go with the instructions that feel most comfortable for you.

Once you've got your entire quilt together, if you didn't stay stitch the edge pieces already it's a good idea to sew around the edge with 1/8 seam allowance. These edges will be tugged during the quilting process, so this is a good way to keep the seams from opening.

Have you got your backing?  I have a favourite method for pattern matching the print on a backing and it's explained in this blog post.

Sheri will be taking my quilt this week to be quilted.  I've chosen a medium blue thread to have it quilted in, and I'm still deciding between those two pantos I shared two weeks ago.  I guess it'll be a game time decision!


My Shawl's left corner is together, and my little guy and I are pretty happy about it!  He is on a twin bed, and so I've been making the quilt according to queen instructions, it will just be a little narrower.  Today is his birthday, and he's asked for a day off of school and Glow in the dark MiniGolf, so we're off to do that today!  Tomorrow my goal is to get the rest of the quilt top together!  Yay for finishing week!


Shawl Quilt Along WEEK 6, April 29th

Week 6!

Congrats to Aurelei Callaghan, you've won the Week 5 prize!  I'll be in touch with your winnings!  Eek!

Week 6 Giveaway:

Next week's prize is a surprise from Aurifil!  I love their thread!  40wt is my fave!  I've had the privilege to work with Aurifil on a few different projects.  We have a thread box that has many favourite colours.  We designed our thread box to match our fabric collection June's Cottage, but also to have some pale neutrals that would blend in with piecing with a lot of different colours.  They've also supplied thread for our Bequest Lookbook for piecing and quilting!  We've blogged about these here.


This week we're doing Step 3 and part of Step 4 in the pattern.  We're cutting some blocks and cornerstones in half (step 3), and sewing some sashing together with blocks and cornerstones to make units (part of step 4).  Just do the first two paragraphs of Step 4.  If you have the printed pattern that's to the end of page 13.  If you have the download, stop before the 4th paragraph on page 9.  Assembling diagonal rows, and assemblong these rows into a quilt top are next week's prompts.


Cutting through finished blocks:
It's not often a comfortable feeling to take a block you've carefully made and cut it in half, but you can do it!

My first experience cutting a block in half was on my Glimmering quilt.  The blocks are made with 108 little paper pieced triangles, and I must have checked my directions nearly ten times before I cut them.  It was my baptism of fire of cutting through finished blocks, and now, everything else is easy!


You can do this! Keep the diagrams in the pattern close, and you'll be just fine!

Just to make the process a little easier, I've made a file with some labeled tags to help you keep these new pieces organized, you can download it here.


Sewing blocks, sashing and cornerstones into Units:
Sewing these units makes next week's quilt assembly all the easier!  Make sure that you're sewing sashing pieces to the correct side of the block. Press all seam allowances towards the sashing!


Psst! Next time you make a quilt with cornerstones and sashing, this trick works to make these seams nest.  Either press all seams toward the sashing, (or all seams away from the sashing) and you'll have seam nesting magic!

Isn't this so exciting, seeing these parts start to come together?  Eek!


A heads up for next week's work:
The instructions for assembling this quilt up look more complicated than they really are. Once you start assembling the quilt top into rows, everything will make a lot of sense.  

Some people are drawn to written instructions, some just want to understand the concepts and take it from there, and some people are drawn to an image.  Quilt Assembly includes instructions for all these different learning styles, so go with the instructions that feel most comfortable for you.

Two weeks from today we'll have finished quilt tops!  Can you believe it?!

Here's where mine's at!  My little guy is pretty happy with it!  I need to shop for a flannel backing  that's a good match (I'm hoping for a wideback), so far it's been tough finding the right blue.  I think I'll use the AD (the palest red) for the binding.


I didn't get ahead like I'd hoped, but I did completely catch up, so yay me!  And yay you!  I love to see your quilts come together.


We are here at: 
WEEK 6, Apr 29th
Step 3 and part of 4 in the pattern; cutting pieces for outer edges and assembling units. 


Next week is:
WEEK 7, May 6th (final week of the QAL)
Assemble quilt top and post your progress by midnight, Sunday May 12th to be entered in the last giveaway.


On May 13th, the final giveaway winner will be announced in a final newsletter.


Keep up your inspiring work!  We're getting so close to the finish!

Shawl Quilt Along, WEEK 5, EASY WEEK!

Week 5!  EASY WEEK!  (Yay!)  

I saw a quote this week that cracked me up, "Whoever wrote the Phrase 'Easy like Sunday Morning', obviously never had to get kids ready for church."  

So Easy Week can mean different things to us, too!  I was on a getaway with my hubby for five days last week, which probably chewed up 7+ days.  So I'm having a catching-up-then-getting-ahead type of week that will go much like my Sunday mornings;
"Let's go, let's go!"
"That's not done yet?  Yikes!"
"Oh man, we're gonna be late!"

But YOU might have a Lionel Richie type of Easy Week, and not do a thing!  


Last week I chat with Pat Sloan on her APQ podcast.  Have you listened?  What did you think of the conversation? Any thoughts? I'd love hear what you would have liked to add to the chat had we all been at a table together!

Can you believe it's time to start thinking about how to finish this quilt?  Here are some of my quilting ideas for Shawl.

First off are you quilting it yourself, or are you going to jump on Violet Quilts' discounted batting and longarm quilting, exclusive to this Quilt Along?  Any way you do it, I can't wait to see!

When I made Shawl in solids for the What Shade Are You, I wanted an asymmetric crosshatch,  but that proved to be very difficult for a handful of reasons.  Sheri did an amazing job, (really, she's amazing!) but it was hard to sew long diagonal lines on the quilt and make stitch lines match up and not have fabric puckered at crossing stitch lines.  She managed to do an amazing job, but it was not an easy job for her (or for me earlier when I tried it on my domestic machine) so I can't recommend it. 

But perhaps you know just how to do it, and it would turn out great for you!


When I made Shawl in our Bequest line, I chose Fancy Schmancy, an Edge to Edge by Karlee Porter.  I love how it turned out! 


This time I'm planning to use one of these two E2E, I can't choose between on point and straight, I'll be taking it to Sheri to be quilted:


If you're thinking of quilting it yourself, here are some great free motion quilting you could consider.  I think this quilt design lends itself to an all over quilting look, so most of these are meander-like quilting that won't draw attention to themselves.

Straight lines, different distances apart:  Use your walking foot!  You'll be sewing across bias, so Spray Baste and starch would be your friends!


Organic Wavy Lines: Use your walking foot!  Consider how high from crest to valley, and how close you want lines to get to each other.


Crossing Organic Wavy Lines: Use your walking foot!  Consider how often you want them to cross over each other, and remember it's easy to get into a visible pattern with this technique, so plan to have ways to break the pattern.


Elongated Meander:  Use your free motion quilting foot! Consider pushing and pulling the quilt through to make the long lines, so you would be working from the side of the quilt if you want these lines to be horizontal.  The lines can be wavy.  Remember to add hooks, Cs, Ns, Es.  You can work your way across the quilt meandering, or pick up and end off on only one side of the quilt at times.


Wood Grain:  Some lines will get very close.  The few lines before or after a knot are very squished close together near the knot, so plan ahead where you would like to have a knot, and set it up a few lines before you get there.  The knot is an elongated swirl,  Some people like the knot to have pointy ends, and some like them soft and round.  
I put little "splinters" in my lines every once in awhile. I make some lines very close together, and some quite far apart, some are wiggly, but most are straight with a little wave.

Please note!  For the final giveaway there's no need to have an entirely quilted and bound quilt.  A  finished quilt top enters you in the final giveaway!

Here's a look at what's coming!

WEEK 5, Apr 22nd

Catch-up, get-ahead or take-it-easy week

WEEK 6, Apr 29th
Step 3 and 4 in the pattern; cutting pieces for outer edges and assembling units.

WEEK 7, May 6th
Assemble quilt top and post by midnight May 12th to be entered in the final giveaway.

May 13th
Final giveaway winner announced!

Congrats to Laurie Macdonald!  She has won the Week 4 prize, this bundle of Bonnie Christine goodness, donated by Beautifully Mended! (Yay!) Please reach out to me with your preferred email address, and I'll get this out to you.


This week’s sponsor is myself!  I'm offering three free digital patterns from the shop! 


Post your week's progress by midnight on Sunday. 

We're getting close to seeing these quilt tops come together.  Can you believe it?

Shawl Quilt Along WEEK 4, April 15th

Week 4 of the quilt along, is all about sashing!  I've been impatiently waiting until I get the sashing made before I put some pieces up on my design wall and see how blocks cornerstones and sashing will look together.  I'm happy that we're almost to this point where we get to see all the parts come together, and make a plaid!

Today, I'm chatting with Pat Sloan on her APQ podcast.  I'm vacationing in Utah while we have our chat, so I'll be at a friend's house using their land line.  I'm excited about our talking points, and I'd love to have you listen in, and hear what you would have liked to add to the chat had we all been at a table together!

Some notes for the week!

Take a look at pressing instructions for sashing.  In a way, sashing pressing is opposite what we've done for blocks and cornerstones.  

All sashing will be assembled this week, then next week is Easy Week, where we get to catch-up, get-ahead or take-it-easy.  I think I'll work on getting ahead; how will you use Easy Week?


WEEK 4, Apr 15th
Cut, strip piece and assemble sashing
Crib 36
Throw 100
Queen 144

WEEK 5, Apr 22nd

Catch-up, get-ahead or take-it-easy week

WEEK 6, Apr 29th
Step 3 and 4 in the pattern; cutting pieces for outer edges and assembling units.

WEEK 7, May 6th
Assemble quilt top and post by midnight May 12th to be entered in the final giveaway.

May 13th
Final giveaway winner announced!

Congrats to Sharon Marley!  She has won the Week 3 prize, donated by Caverly, my sister-in-law, and co-creator of Briar Hill.  Please reach out to me with your preferred email address, and I'll get this out to you once I'm back at my home computer.


This week’s sponsor is Beautifully Mended, an online fabric shop I adore!  Lacey has a gift for gathering fabrics for curated bundles.  Every time a Beautifully Mended bundle shows up in my Instagram feed I audibly gasp.  I was so thrilled when she contacted me offering to sponsor the QAL and supply one of her magically curated fabric bundles.

Just look at this!


So good!  This bundle of Bonnie Christine goodness will be sent to one lucky winner!

Post your sashing progress by midnight on Sunday for a chance to win.

Happy sewing this week.

Shawl Quilt Along WEEK 3, April 8th


Week 3 of the quilt along, and we are making cornerstones!


Some notes for the week!

Since there are nine identically sized squares in the cornerstone, it’s possible to think you’re sewing fabrics together right, but be mistaken.  Check that your fabrics are in order (1.) in the strip set, and also (2.) when you’re sewing the three strip sets together.

And just in case you have some unfortunate unpicking to do, here’s my trick:  I pick every 7th-9th stitch on one side of the seam.  Then I loosen a thread on the opposite of the seam and pull it away from the seam.

This thread often pulls entirely out without the thread breaking, and I have inch long threads on the other side to easily pull out.


Spice up your sewing!
There is often a huge contrast within this small cornerstone. Sometimes when I have made Shawl, I've changed my thread colour at different times to make sure the thread is a good match, and remains unseen.  (Also I find it spices up the process to use a different thread colour. It's a simple pleasure!)

This week is a light work week.  The cornerstones are small, and we’re making all you need for your quilt top this week.

WEEK 3, Apr 8th
Cut, strip piece and assemble cornerstones
Crib 18
Throw 50
Queen 72


Also here's a look at what's coming next!

WEEK 4, Apr 15th
Cut, strip piece and assemble sashing
Crib 36
Throw 100
Queen 144

WEEK 5, Apr 22nd

Catch-up, get-ahead or take-it-easy week


Congrats to Laurie MacDonald @harbourcolour!  She has won the Week 2 prize, donated by Soak Was Inc..  Please reach out to me with your mailing address, and I'll get that mailed out to you Laurie!


This week’s sponsor is my cohort in creativity, Caverly!  She’ll be sending this bundle of digital artwork/ . Print them and frame for your home, have one printed on fabric, or use one digitally as wallpaper for your phone and computer to brighten up your every day.  My house has several pieces by Cav, and I also have her artwork on my iphone screen.  I am in love with her style!  


Post your cornerstone progress by midnight on Sunday to win!

Shawl Quilt Along WEEK 2, April 1st

It’s Week Two of the Shawl Quilt Along! I am looking forward to finishing up blocks this week. It was so nice to sit down at my sewing machine last week and just do some easy sewing.


Here are some things I wanted to make note of this week! 

First off, Seam Allowance:

In most quilts it is important to have an exact quarter inch seam allowance to make all the pieces fit. In case you're still working on excelling at your quarter inch seam allowance, you can breathe easy in this quilt. As long as your seam allowance is consistent, your blocks, sashing and cornerstones will all end up that little bit bigger or smaller.  It works out this way because all three sections of the quilt (block, sashing, and cornerstone) have the same number of horizontal and vertical seams.  They will all turn out being a little big if you have a scant quarter inch and being a little small if you have a generous quarter-inch. Either way doesn’t matter. You don’t have to worry about the finished size of the blocks.

As long as your seam allowance is consistent, the three sections will all end up fitting together.


This weekend my guild is going on retreat.  I’ll be there for a day and a half, and I’m looking forward to just sewing.  I'll finish up my blocks, cut out my cornerstones for Week 3, and work on a few other projects.


Second:
Take a moment this week and place a little swatch all of your fabrics into this chart in your pattern.  This will be a great reference as you sew parts of cornerstones and sashing together. 
So far we have only worked with three colours, but in the next weeks will be working with many more colours.  It could be an easy mistake to sew two of the wrong colours together, or sew strip sets upside down in the cornerstones.  Having this chart as a reference is a great idea.  You know what they say, "An ounce of prevention is worth a pound of stitch ripping!"

In case you hadn't seen this announcement:

Congrats to Melanie from @abitofscrapstuff.  She's won a big bundle of Missouri Star rulers and templates!  Thanks Missouri Star!  Also, thanks to you for following along.  This Quilt Along is full of amazing prizes, so keep those pictures coming of your progress, and perhaps you'll win this week's prize...

...which is sponsored by Soak Wash.  I contacted them asking if they might like to be sponsors especially because I love to tell others about products I enjoy.  Soakwash has three different products in a variety of scents (and unscented). 

Their first product is Soak, which is a liquid soap that cleans your handknits and delicates just by letting them soak.  No agitation required!  
Their second product is Flatter.  It's a spray which releases wrinkles with or without ironing.  It allows the fabric to rest, so it's also great for pressing seams flat.  You know that pesky crease right in the middle of a width of fabric?  Once I've sewn my strip set together, I spritz a little on those creases, then the fabric rests and lays flat! 
Their third product is Handmaid, a soothing hand lotion!

Soakwash is giving one of us a bundle of all three products in their Celebration scent.

Winner will be drawn from posts sharing your progress for this week.  Post by midnight on Sunday to enter!

Happy sewing this week, guys!

Shawl Quilt - Fabric selection

Today I'm sharing some additional tips on choosing fabrics for the Shawl quilt pattern!


In the Shawl pattern I give some tips on fabric selection, and also in the Color Hexa blog post there are tips on how to choose colour selection.  This extra blog post is not meant to overcomplicate the process, so if you're into a groove with the other resources available, then by all means, stay with what's working for you!  But, since colour selection matters to achieve the woven plaid look of the quilt, and since there are so many ways to choose colours successfully, I thought I'd mention some simple tips for any of you who would find this additional info helpful!

The Shawl quilt is a visual effect, where fabric can achieve the look of a woven plaid. There's a formula in the pattern that can help you choose the right colours, whether you're using prints or solids.

So far I've made this quilt three times, all in very different colour palettes; twice in prints, and once in solids.  So for the upcoming QAL, I thought I'd play with solids once again.  This quilt will be going on my youngest son's bed.  My goal is to re-do all my kids's bedding this year, and so I'm looking forward to knowing this first one will be checked off the list in a matter of weeks!

Here's my in-progress fabric palette.  I'll share my thoughts as I narrow it down to the final palette.


Unlike other times I've chosen a  Shawl palette, I started with a plaid that I liked the colours of.  These two Robert Kaufman plaids were my inspiration.  I didn't have the actual Robert Kaufman Mammoth Flannels on hand though, so my aim was to find a similar:
Black or charcoal,
Red,
White, and
Dark blue,
then put these plaids aside and work with the four colours to find the right interacting colours.

This time I didn't use Color Hexa, or any other digital colour blending tool, just my imagination as I auditioned different bolts of fabric in the fabric store.


I've actually ordered this one to use as a backing for either a quilt or a duvet in my boys' room, so I'm excited to have a Shawl quilt that will be inspired by these colours.

At the quilt shop I wrote the letters on a scraps of paper to mark the bolts as I chose, and one by one selected my colours.  In what felt like 45 minutes later walked out with all the fabrics I needed.  I am the slowest decision maker I've ever met, so if I can do it, so can you!

I couldn't decide between two prints for AD and BD, so I settled to just buy both since this quilt shop was 40 minutes from home, and planned to make the final decision later.

Also, AB should be lighter than AC, since B is lighter than C, so I popped into a store today and found the right blue for AC.  (Also I could have switched AB and AC and that could have done the trick, too!


Here are some recommendations for how to simplify the colour selection process:

1.  Search for a plaid that you already like the colours of, and refer to that when selecting your fabric.

2.  Usually we find it pretty easy to imagine what any given colour would look like mixed with black or white, so consider using white or black (or nearly white or black) as one or two of your first four colours.   For this quilt I chose a "nearly-white" pale grey blue for A, and a "nearly black" charcoal for C.  This made choosing blended colours easy!

3.  As mentioned in the pattern: A, B, and AB will be the most used fabrics in your quilt, so find colours for these three that you really love!

4.  Don't overcomplicate the process!  Somehow this perception of a woven plaid still works in prints, even.  Our brains are amazing at perceiving pattern and organization.  For example, don't blue and red make purple?  Yes, but I opted for burgundy/maroon in my palette for the red/blue blended colours.  Though my boys both really like purple, I didn't want to introduce yet another colour into their bedroom, so I was happy to find some burgundies that still fit.


For this blog post, I plunked some similar colours into Electric Quilt, and came up with this image to get an idea of how the colours I chose would look.  If I didn't have EQ, I would have used the colouring page from the pattern.  I like it, and I think my little guy will, too!

We start our QAL on the 25th, kicking it off with a giveaway!  As has been mentioned before, if you have signed up for the QALI'm looking forward to telling you more about the giveaways, and getting acquainted with you and seeing your fabric palettes!  A QAL is a great opportunity to find and make quilty friends, so I'll be encouraging you to share pics of your process and use the hashtag #shawlquilt, and tagging me @briarhilldesigns so that I don't miss a post!

All the important info regarding the QAL is posted in this linked blog post, and signing up for the QAL is there as well!  

I can't wait to get started!