Shawl Quilt Along WEEK 6, April 29th

Week 6!

Congrats to Aurelei Callaghan, you've won the Week 5 prize!  I'll be in touch with your winnings!  Eek!

Week 6 Giveaway:

Next week's prize is a surprise from Aurifil!  I love their thread!  40wt is my fave!  I've had the privilege to work with Aurifil on a few different projects.  We have a thread box that has many favourite colours.  We designed our thread box to match our fabric collection June's Cottage, but also to have some pale neutrals that would blend in with piecing with a lot of different colours.  They've also supplied thread for our Bequest Lookbook for piecing and quilting!  We've blogged about these here.


This week we're doing Step 3 and part of Step 4 in the pattern.  We're cutting some blocks and cornerstones in half (step 3), and sewing some sashing together with blocks and cornerstones to make units (part of step 4).  Just do the first two paragraphs of Step 4.  If you have the printed pattern that's to the end of page 13.  If you have the download, stop before the 4th paragraph on page 9.  Assembling diagonal rows, and assemblong these rows into a quilt top are next week's prompts.


Cutting through finished blocks:
It's not often a comfortable feeling to take a block you've carefully made and cut it in half, but you can do it!

My first experience cutting a block in half was on my Glimmering quilt.  The blocks are made with 108 little paper pieced triangles, and I must have checked my directions nearly ten times before I cut them.  It was my baptism of fire of cutting through finished blocks, and now, everything else is easy!


You can do this! Keep the diagrams in the pattern close, and you'll be just fine!

Just to make the process a little easier, I've made a file with some labeled tags to help you keep these new pieces organized, you can download it here.


Sewing blocks, sashing and cornerstones into Units:
Sewing these units makes next week's quilt assembly all the easier!  Make sure that you're sewing sashing pieces to the correct side of the block. Press all seam allowances towards the sashing!


Psst! Next time you make a quilt with cornerstones and sashing, this trick works to make these seams nest.  Either press all seams toward the sashing, (or all seams away from the sashing) and you'll have seam nesting magic!

Isn't this so exciting, seeing these parts start to come together?  Eek!


A heads up for next week's work:
The instructions for assembling this quilt up look more complicated than they really are. Once you start assembling the quilt top into rows, everything will make a lot of sense.  

Some people are drawn to written instructions, some just want to understand the concepts and take it from there, and some people are drawn to an image.  Quilt Assembly includes instructions for all these different learning styles, so go with the instructions that feel most comfortable for you.

Two weeks from today we'll have finished quilt tops!  Can you believe it?!

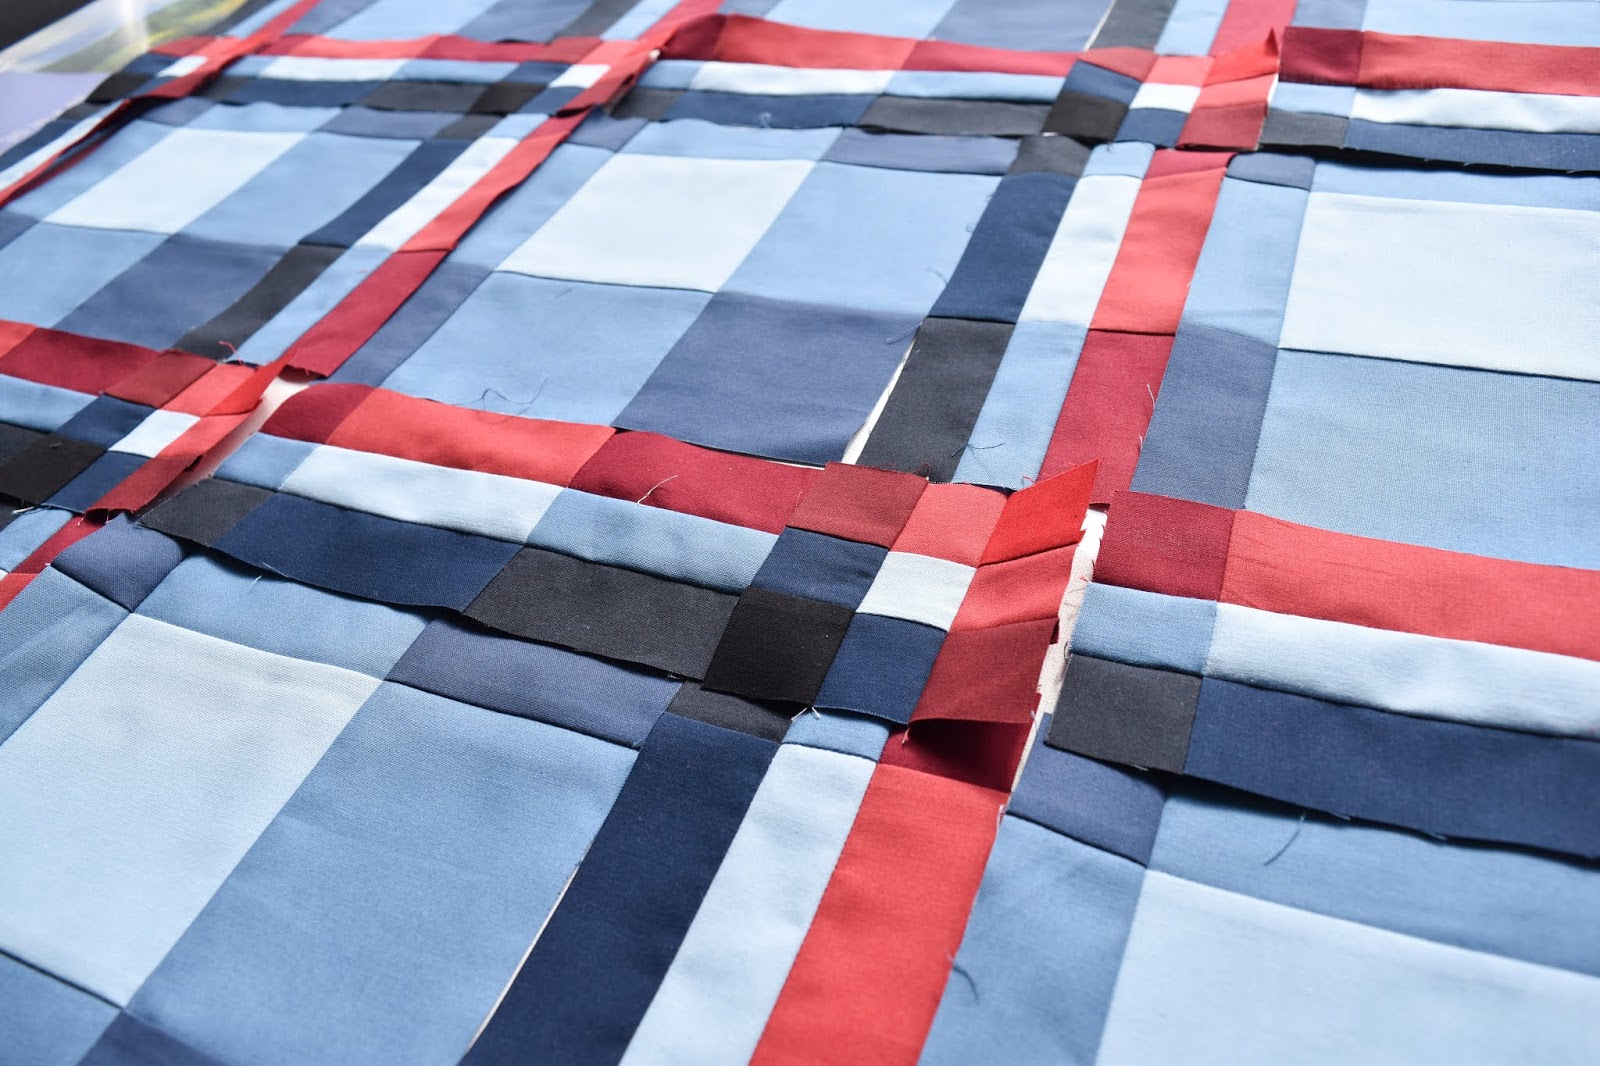
Here's where mine's at!  My little guy is pretty happy with it!  I need to shop for a flannel backing  that's a good match (I'm hoping for a wideback), so far it's been tough finding the right blue.  I think I'll use the AD (the palest red) for the binding.


I didn't get ahead like I'd hoped, but I did completely catch up, so yay me!  And yay you!  I love to see your quilts come together.


We are here at: 
WEEK 6, Apr 29th
Step 3 and part of 4 in the pattern; cutting pieces for outer edges and assembling units. 


Next week is:
WEEK 7, May 6th (final week of the QAL)
Assemble quilt top and post your progress by midnight, Sunday May 12th to be entered in the last giveaway.


On May 13th, the final giveaway winner will be announced in a final newsletter.


Keep up your inspiring work!  We're getting so close to the finish!

Yonder Quilt Along, WEEK 1, April 29th

Virtual confetti dump!  Yonder QAL is open!


THANK YOU for joining!  We have 119 participants!  I hugely appreciate your enthusiasm for this pattern.

There's so much to cover in our opening post so I've divided things into categories to help you find what you're looking for. 


Giveaway!


Our opening Giveaway is a $30 Gift Card from Maker Valley!  Just enough to get yourself that quilty shirt you've been wanting, or some cute sewing related enamel pins!  Congrats to Julie Kerr!  I have your email address, so I'll get that gift card to you, pronto!


Although our first giveaway was open to everyone who signed up and purchased the pattern, future giveaways will be selected from posts on Instagram sharing your progress, using #yonderquilt, and tagging me @briarhilldesigns.  This week I'd love to see your palettes and/or progress!


Here's the palette for my first Yonder!  This is Garden Club by Brenda Ratliff of Pink Castle Fabrics, a fellow textile designer with RJR.  I needed a few extra fabrics to make the Twin size of the quilt, so I added a handful of RJR solids into the mix.


Our Epic Sponsors!

We have an amazing lineup of sponsors!  I love to get to brag up businesses I admire and believe in!  They've been very generous with their prizes for us, and I encourage us all to show our appreciation by checking out, and if you like, following these inspiring creative businesses.


Our giveaway for Week 1 is Winner's Selection of 3 large spools of Aurifil thread, and a pattern from our Briar Hill Etsy shop!


I'd probably want these three - Aluminum 2615, Chalk 2026, and Fairy Floss 6723. What would you choose?


Share your progress for the week by midnight on Sunday to be entered in the Week 1 Giveaway.  Winner will be announced in the Week 2 newsletter and blog.


This week's goal:


Since we are going to start sewing blocks next week, we need all the fabric cut for the entire quilt top.  


(Palette for the second Yonder I'm making from Dylan M's line Mazy's Garden, plus some neutrals from a variety of designers to build out the palette.)

This week we are working through Steps 1 and 2 in the pattern: cutting all the fabric we need for our quilt, stacking pieces of the same print and letter,... 


...then sorting which prints we want in a block together. Please note that in the image above, B1 and B2 are together in the B pile, and C1, C2, and C3 are together in the C pile.  When choosing which fabrics will go in a block together, I take a stack of D first because it's the largest, then select a stack from E, C, B, and then select A as the cherry on the top.


Here is how my bundles for individual blocks look.  

Don't feel pressure to gather the perfect assortment of colours and print for every single block.  Remember.  They're all going into the same quilt.  I've learned that if I only allow the best matches to become a block instead of allowing for some unexpected fabric mashups, an assembled quilt top can look segmented and less cohesive.  So, reminding myself, "They're all going into the same quilt." when matching up fabrics helps me make a quilt I love.


Some tutorials to help you get started:

First, here's a quick tutorial on how I stack my prints, and trim them to make as little waste as possible.  I use fat quarters to demonstrate this, but the same can apply to your full width yardage.


Want to see it on You Tube?  Click here.

As promised, here are links to the (optional) bonus blog posts:  These are meant to be a support if you would like to: 1.  Use fat quarters instead of yardage to make your Yonder Quilt, or 2.  Make a directional print upright in every part of the block.  That's not necessary (I enjoy my directional prints to be any-which-way) but if it's your style, the blog post will be a help.  If you're following the pattern as it stands, there's no need for you to read this content.

Using Fat Quarters for Yonder

Using directional prints with Yonder

I've made printable files of these tutorials.  You can download and print them from here.

ALSO, I've made you some labels to help keep your project organized.  They're also available through the link above.


Just in case using templates in the way described in the pattern is new to you, here's some info on how they're used.

1. Cut out the template.
2. Select one of your acrylic rulers that is just a little bigger than the size of the template.
3. Determine which edges of the paper template will need to be cut (arrows on paper templates point to these edges). These edges will be lined up to an edge on your ruler.
4. Tape these templates (right-side-up) to the underside of your ruler using a clear tape (I use Scotch Magic Tape).  We'll call these Ruler Templates.
5.  Align ruler template D or E to the stack of  D or E pcs cut. There are four D or E pcs per block, so you can cut all four at the same time.  Cut fabric to shape of template. The triangles cut away won't be used for this pattern.


Next week I'll be sharing my Yonder block assembly tips!

I recommend using a 6 1/2" ruler for trimming parts of the block next week.  If you'd like to order one fast, here's a link!


Some housekeeping details:

Long story short: 
Please use #yonderquilt in all your social media posts!  

You can follow this hashtag on Instagram to keep an eye on what other QAL-ers are up to!  I hugely encourage cheering on other quilt along-ers, and making a few new quilty friends! 

Long story long:
Last summer when I designed this pattern it was top-secret until Quilt Market weekend.  It’s not easy to name a quilt, and I finally found a name that was unused, and a good fit, Yonder. 

A few days previous to Market, a quilter I hugely admire, @eyecandyquilts announced her cute new pattern, Yonder.  What?!  What are the chances?!  I sent her a message and our unlikely and funny conversation went like this:

Me: Hi! Have you just named a pattern Yonder? I did too! 

Eye Candy Quilts: Yep!

Me: Yikes!  Mine is debuting in the C+S booth.  I would change it, but I don't think I'm able to.

Eye Candy Quilts: Mine is in Moda's sales materials.  Oh well!  It happens all the time!

Me:  Yup!  Well you know what they say about great minds!

I’m telling you this, because guess what!  The story gets even more ironic!  We’re both hosting quilt alongs with our individual Yonder patterns.  Hers starts in 2 days, so the Yonder quilt along Google search, and hashtags will show results for two Yonder Quilt Alongs.  

So to keep things tidy, we will use hashtags #yonderquilt primarily, and please tag me @briarhilldesigns in your posts so I don't miss a thing!  

Annaliese will be using other Yonder quilt along related hashtags for her quilt along like #yonderqal and #yonderquiltalong.  It doesn't mean we can't use "her" hashtags, or her participants can't use "ours", because we can, and they can.  I'm just promoting #yonderquilt as the one I'd primarily like you to use, and I'll be drawing winners from the #yonderquilt hashtag shared through Instagram.

If there is any content that needs to be added later in a week, it will be added to the bottom of that week's blog post, and a newsletter will go out to link you to the additional content.

Any questions, please feel welcome to email me at briarhilldesigns@gmail.com.


Here's the plan for every week of the QAL:

WEEK 1, April 29th 
Steps 1 and 2: Cut all fabric for your blocks, match up fabrics you would like in the same block.


WEEK 2, May 6th
Sew a third of the blocks
Bassinet:1
Throw: 5
Twin: 8
King: 12

WEEK 3, May 13th
Sew a third of the blocks
Bassinet:1
Throw: 5
Twin: 8
King: 12

WEEK 4, May 20th
Catch-up, get-ahead or take-it-easy week

WEEK 5, May 27th
Sew remaining blocks
Bassinet: 2
Throw: 6
Twin: 9
King: 12

WEEK 6, June 3rd
Layout and assemble quilt top.  Post by midnight June 9th to be entered in the final giveaway.

June 10th


Final giveaway winner announced!

Any questions, please feel welcome to email me at briarhilldesigns@gmail.com. 


Using Fat Quarters for the Yonder Quilt

Anticipating the question, "Can I use fat quarters for the Yonder pattern?"  I decided to prepare a blog post instructing how to do it.

In answering the question, I'd say, "Yyyyyessss, bbbbbut, it's tight!"

Quilt pattern designers often add 15% more to the yardage requirements to accommodate fabric cut crooked in the store, shrinkage if you prewash, a ruler that slipped, a rotary cutter that went rogue or a mis-cut.  So, yes it can all fit, but I recommend having a couple extra FQs on hand to allow for any additional fabric that might be needed.  This post and the diagrams assume that you will be able to get 17" x 20" of useable fabric from every fat quarter.  So, I was able to make Yonder using fat quarters, and you'll be able to, as well.

Get a printable file of this tutorial here, along with other Yonder bonus files.

This blog post is meant to be used hand in hand with the Yonder pattern, and I recommend you familiarize yourself with the foundational instructions in the pattern before proceeding with this tutorial, so that these instructions make sense.

The Yonder pattern requires 5/8 yard per block, so if you're making the Throw (16 blocks) according to the pattern, you need 16 x 5/8 yd.

Since YOU are using fat quarters, you will need 2 FQs per block.  So if you're making the Throw, (16 blocks), you need 16 blocks x 2 FQs each, totalling 32 fat quarters.

Here are the fat quarter needs for all sizes of the pattern:

Bassinet:  8 FQs 
In the pattern there's an exception for making the bassinet, and using 5/8 yds per block.  This is actually resolved because you are using FQs.  The bassinet has four blocks, but since there's 5 parts to the block you would need five 5/8 yards so you didn't have two sections of the block in the same fabric.  Since you're using fqs, and you need 2 fqs per block (and since you're adding variety to the palette by using 2 FQs per block), there's no exception and you need only 8 fat quarters.

Throw:  32 FQs

Twin:  50 FQs

King:  72 FQs

In the pattern the 5/8 yard allows you to cut all you need for one block out of every single fabric.  Then, that one fabric will part of five different blocks, it will be A - centre square in one block, B - star in another block, C - star echo in another block, etc.

Since YOU are using two fat quarters instead, one fat quarter will be used in sections A, B, D, and the other fat quarter will be used in sections C and E.

Divide your fat quarters into two piles (one that will become sections A, B, D, and the other will become sections C, E.  Follow Step 1 directions in the pattern, refer to the cutting chart in the pattern, and refer to these diagrams.

Note that ALL pieces with the same letter are cut from the same fabric.  This is essential because the Star needs to be made with one fabric to appear as a star, and same goes for other letters with multiple pieces.

An exception:
Beside the fact that you're cutting these pieces from two different fabrics instead of one, the only exception is how you cut B2.  This piece will be cut from the discarded triangle from D.  Stack these four triangles and follow the directions in the diagram.  This will give you the four triangles you need for B2.

Then proceed with Step 2 in the pattern.

Using directional prints with Yonder Quilt


A directional print: A print that has an obvious right side up and an upside down, or a stripe that you want to be in the same direction in every piece of the block.


This is a bonus post I've decided to supply to take the guesswork out of how to cut these pieces in case you have a directional print that you would like to be upright in your Yonder block.  

Get the printable file for this tutorial here, along with other bonus files!

I have used directional prints in the Yonder blocks I've made, but stuck to the pattern’s cutting chart, and let the direction of the print in the individual parts be any-which-way.  I like it to have that scrappy, laid-back look, so don't feel like your stripe or directional fabric needs to be cut according to these additional instructions.  

But, if it’s your style to want every piece of a star (or section of the block) to have the same orientation, go for it!

These instructions are meant to be used hand-in-hand with the pattern, and add a level of complication to cutting, but I’ll aim to make it as clear as possible.  

First, some notes:

I recommend upping your yardage for any directional print to 3/4 yards to compensate for some diagonal cuts.  In the pattern every piece is cut on the straight of grain to start, then some are sub cut or cut to the size of the template.  To make these sections have all the same orientation, you will need to cut a 45° angle, then cut the dimensions of the piece from that diagonal cut.

Please consider that these different cuts will mean that the straight-of-grain and the bias will now be in different places in the pieces.  It could be a good idea to starch these prints before cutting so they don't stretch where they wouldn't have otherwise.

I'd recommend only having one of the five A-E sections have a directionally cut print in any one block.

Once cut, lay out the full block before assembly to ensure that every directional piece is facing the way you wish it.


Happy sewing!

Shawl Quilt Along, WEEK 5, EASY WEEK!

Week 5!  EASY WEEK!  (Yay!)  

I saw a quote this week that cracked me up, "Whoever wrote the Phrase 'Easy like Sunday Morning', obviously never had to get kids ready for church."  

So Easy Week can mean different things to us, too!  I was on a getaway with my hubby for five days last week, which probably chewed up 7+ days.  So I'm having a catching-up-then-getting-ahead type of week that will go much like my Sunday mornings;
"Let's go, let's go!"
"That's not done yet?  Yikes!"
"Oh man, we're gonna be late!"

But YOU might have a Lionel Richie type of Easy Week, and not do a thing!  


Last week I chat with Pat Sloan on her APQ podcast.  Have you listened?  What did you think of the conversation? Any thoughts? I'd love hear what you would have liked to add to the chat had we all been at a table together!

Can you believe it's time to start thinking about how to finish this quilt?  Here are some of my quilting ideas for Shawl.

First off are you quilting it yourself, or are you going to jump on Violet Quilts' discounted batting and longarm quilting, exclusive to this Quilt Along?  Any way you do it, I can't wait to see!

When I made Shawl in solids for the What Shade Are You, I wanted an asymmetric crosshatch,  but that proved to be very difficult for a handful of reasons.  Sheri did an amazing job, (really, she's amazing!) but it was hard to sew long diagonal lines on the quilt and make stitch lines match up and not have fabric puckered at crossing stitch lines.  She managed to do an amazing job, but it was not an easy job for her (or for me earlier when I tried it on my domestic machine) so I can't recommend it. 

But perhaps you know just how to do it, and it would turn out great for you!


When I made Shawl in our Bequest line, I chose Fancy Schmancy, an Edge to Edge by Karlee Porter.  I love how it turned out! 


This time I'm planning to use one of these two E2E, I can't choose between on point and straight, I'll be taking it to Sheri to be quilted:


If you're thinking of quilting it yourself, here are some great free motion quilting you could consider.  I think this quilt design lends itself to an all over quilting look, so most of these are meander-like quilting that won't draw attention to themselves.

Straight lines, different distances apart:  Use your walking foot!  You'll be sewing across bias, so Spray Baste and starch would be your friends!


Organic Wavy Lines: Use your walking foot!  Consider how high from crest to valley, and how close you want lines to get to each other.


Crossing Organic Wavy Lines: Use your walking foot!  Consider how often you want them to cross over each other, and remember it's easy to get into a visible pattern with this technique, so plan to have ways to break the pattern.


Elongated Meander:  Use your free motion quilting foot! Consider pushing and pulling the quilt through to make the long lines, so you would be working from the side of the quilt if you want these lines to be horizontal.  The lines can be wavy.  Remember to add hooks, Cs, Ns, Es.  You can work your way across the quilt meandering, or pick up and end off on only one side of the quilt at times.


Wood Grain:  Some lines will get very close.  The few lines before or after a knot are very squished close together near the knot, so plan ahead where you would like to have a knot, and set it up a few lines before you get there.  The knot is an elongated swirl,  Some people like the knot to have pointy ends, and some like them soft and round.  
I put little "splinters" in my lines every once in awhile. I make some lines very close together, and some quite far apart, some are wiggly, but most are straight with a little wave.

Please note!  For the final giveaway there's no need to have an entirely quilted and bound quilt.  A  finished quilt top enters you in the final giveaway!

Here's a look at what's coming!

WEEK 5, Apr 22nd

Catch-up, get-ahead or take-it-easy week

WEEK 6, Apr 29th
Step 3 and 4 in the pattern; cutting pieces for outer edges and assembling units.

WEEK 7, May 6th
Assemble quilt top and post by midnight May 12th to be entered in the final giveaway.

May 13th
Final giveaway winner announced!

Congrats to Laurie Macdonald!  She has won the Week 4 prize, this bundle of Bonnie Christine goodness, donated by Beautifully Mended! (Yay!) Please reach out to me with your preferred email address, and I'll get this out to you.


This week’s sponsor is myself!  I'm offering three free digital patterns from the shop! 


Post your week's progress by midnight on Sunday. 

We're getting close to seeing these quilt tops come together.  Can you believe it?

Shawl Quilt Along WEEK 4, April 15th

Week 4 of the quilt along, is all about sashing!  I've been impatiently waiting until I get the sashing made before I put some pieces up on my design wall and see how blocks cornerstones and sashing will look together.  I'm happy that we're almost to this point where we get to see all the parts come together, and make a plaid!

Today, I'm chatting with Pat Sloan on her APQ podcast.  I'm vacationing in Utah while we have our chat, so I'll be at a friend's house using their land line.  I'm excited about our talking points, and I'd love to have you listen in, and hear what you would have liked to add to the chat had we all been at a table together!

Some notes for the week!

Take a look at pressing instructions for sashing.  In a way, sashing pressing is opposite what we've done for blocks and cornerstones.  

All sashing will be assembled this week, then next week is Easy Week, where we get to catch-up, get-ahead or take-it-easy.  I think I'll work on getting ahead; how will you use Easy Week?


WEEK 4, Apr 15th
Cut, strip piece and assemble sashing
Crib 36
Throw 100
Queen 144

WEEK 5, Apr 22nd

Catch-up, get-ahead or take-it-easy week

WEEK 6, Apr 29th
Step 3 and 4 in the pattern; cutting pieces for outer edges and assembling units.

WEEK 7, May 6th
Assemble quilt top and post by midnight May 12th to be entered in the final giveaway.

May 13th
Final giveaway winner announced!

Congrats to Sharon Marley!  She has won the Week 3 prize, donated by Caverly, my sister-in-law, and co-creator of Briar Hill.  Please reach out to me with your preferred email address, and I'll get this out to you once I'm back at my home computer.


This week’s sponsor is Beautifully Mended, an online fabric shop I adore!  Lacey has a gift for gathering fabrics for curated bundles.  Every time a Beautifully Mended bundle shows up in my Instagram feed I audibly gasp.  I was so thrilled when she contacted me offering to sponsor the QAL and supply one of her magically curated fabric bundles.

Just look at this!


So good!  This bundle of Bonnie Christine goodness will be sent to one lucky winner!

Post your sashing progress by midnight on Sunday for a chance to win.

Happy sewing this week.